This article describes how I rigged and used a Gerr downhaul on SPRITE, my Cape Dory 25. A Gerr downhaul allows you to douse the jib without going all the way forward. If carefully rigged, it can prevent the jib halyard from flying away if you let it go on a bouncy foredeck. The parts list is below. In this article I use jib to refer to either a jib or a genoa.
I have used the Gerr downhaul on both a working jib and a 135 genoa. Some articles say the Gerr downhaul will get the jib into a nicely contained ball on the foredeck. That has not been my experience but I have found that the downhaul generally keeps the sail out of the water. The downhaul works better with my old jib than with the new genoa, I think mostly due to the stiffness.
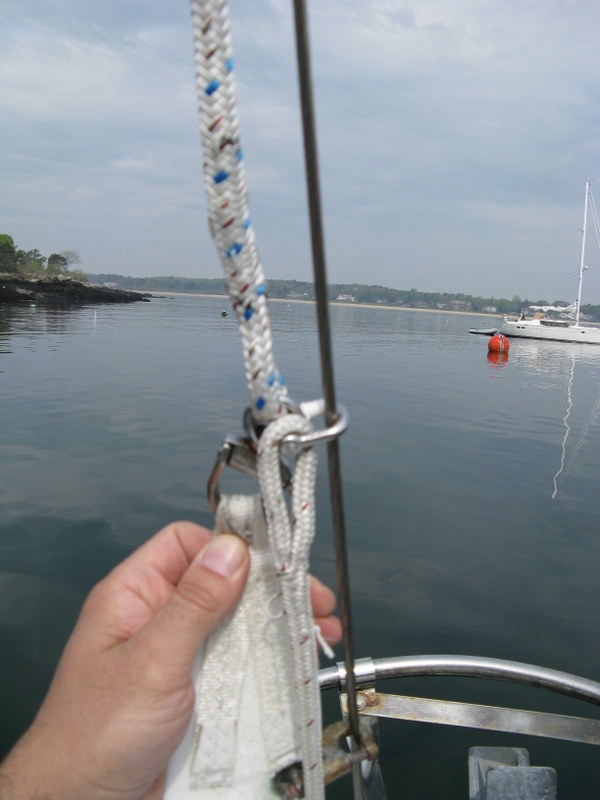
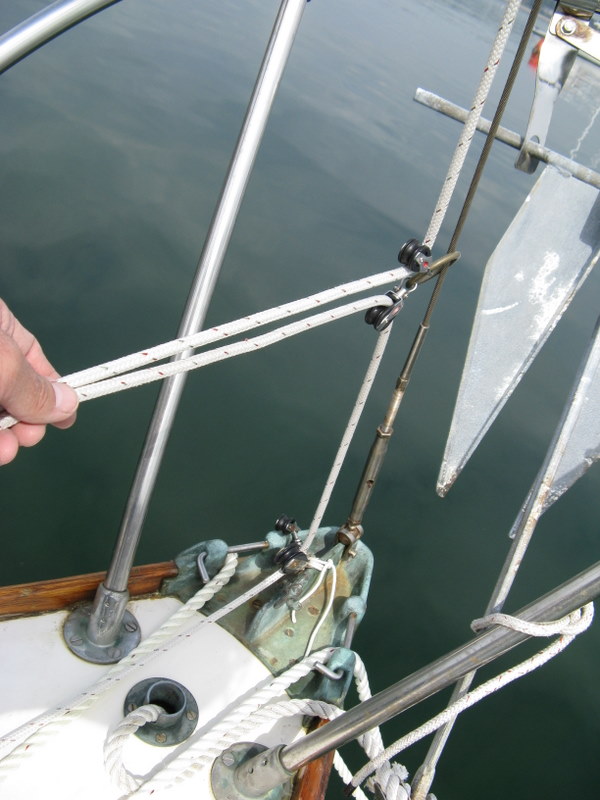
Gerr Downhaul: Halyard, downhaul and shackle on forestay
Gerr Downhaul: Halyard, downhaul and shackle on forestay
Gerr Downhaul: Halyard, downhaul and shackle on forestay
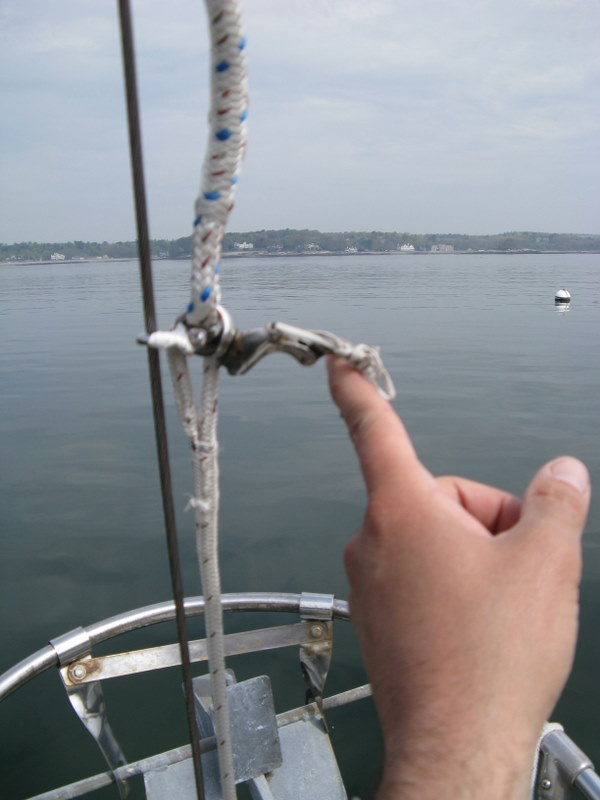
Gerr Downhaul: Forestay ring with swivel blocks (sail attached)
Gerr Downhaul: Forestay ring with swivel blocks (without sail)
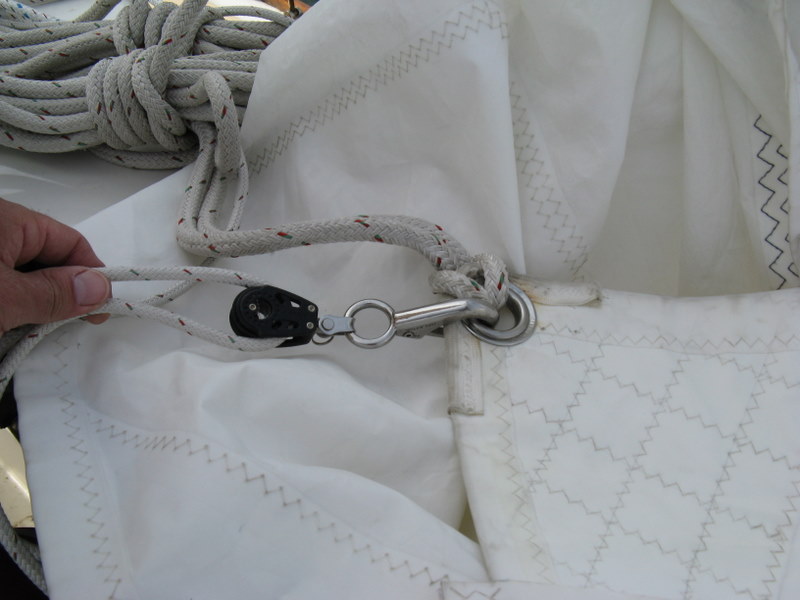
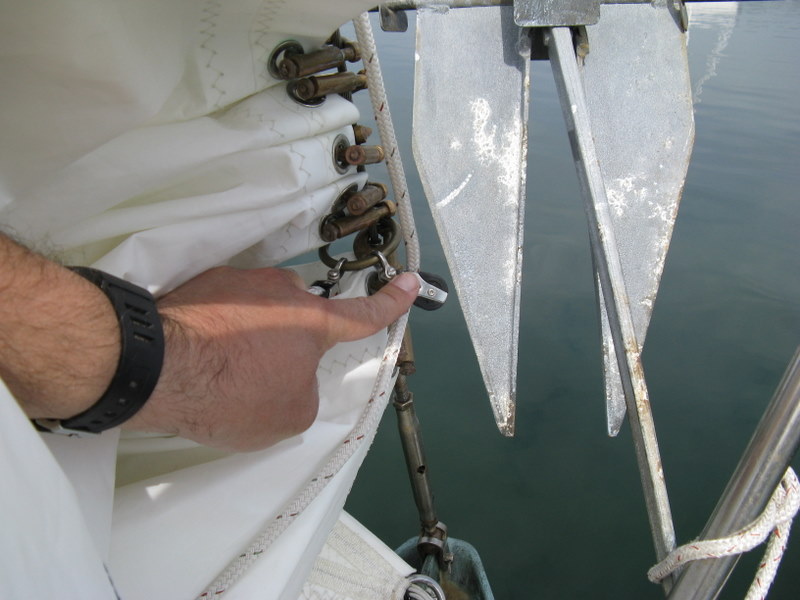
Gerr Downhaul: Connection to Jib Clew
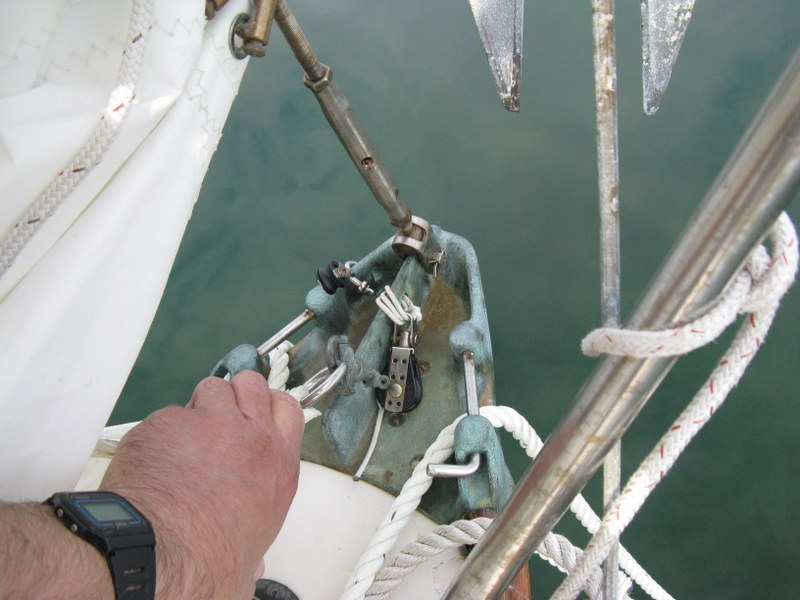
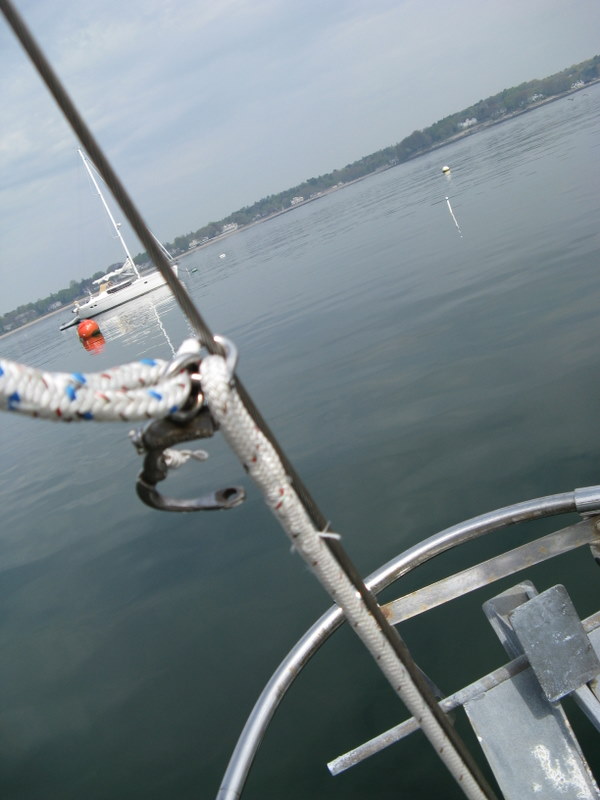
Gerr Downhaul: Block at forestay fitting
Place an eye splice in one end of the downhaul. Attach the D shackle to the forestay, the downhaul eye splice and the jib halyard shackle (jump to photo). Attach two swivel blocks to the ring. Put the forestay through the bronze ring (jump to photo). If the mast is unstepped, this is easy -- otherwise see below). Attach one swivel block to the snap shackle. Attach the remaining swivel block to the forestay plate (jump to photo).
The rigging proceeds from the downhaul eye splice (at the the head of the jib) and proceeds to the tail end of the line. Reeve the downhaul through the starboard block attached to the bronze ring. Then reeve the downhaul through the block attached to the snap hook. Then reeve the downhaul through the port block attached to the bronze ring. Finally, reeve the downhaul through the block attached to the forestay plate.
I coil the downhaul and cleat it off over the jib halyard, on the mast winch. You may suit your fancy here -- I do this so that I remember to free the downhaul in the next step. Also, when the jib is not in use, I still clip the jib halyard to the stemhead fitting, tighten and leave the downhaul somewhat slack. This way I can leave the downhaul at the mast.
I attach the snap hook to the starboard, forward, lower shroud. Lay the jib between the two lines coming from the bronze ring. While keeping between the lines, attach the jib tack and attach the lowest four barrel fasteners to the forestay. Ensure the bronze ring is above these four fasteners (jump to photo). Finally, attach the rest of the jib's barrel fasteners above the ring and attach the head to the halyard. Snap the downhaul snap hook to the jib's clew (jump to photo). You are now ready to raise the sail.
Prior to raining the sail, ensure the downhaul can run free by uncleating at the mast and laying a loose coil forward of the mast. Then haul away on the jib halyard. If you feel any resistance while hauling, give the halyard a few shakes and the jib should flow out nicely. If not, go forward to figure out what is wrong, usually a mistake in rigging. It also may just come free once the sail is drawing and the sheet is pulled in. Until you know what it should look like, if there is a problem, go forward to check.
Once the jib is hoisted, take a look at the angle the downhaul makes to the forestay; it should be about 90 degrees. If it's not, you may have excessive binding when raising or lowering sail. To achieve the correct angle, place the ring either higher or lower on the forestay by putting more or fewer barrel fasteners below the ring. I use four on both my jib and genoa which seems to work pretty well but your sail may be different.
Prepare to lower sail in the usual way; either by heaving to or heading into the wind. Then use one of the following methods. Either one will quickly stop the sail from flogging and quiet things down, especially if you are hove-to.
The usual method for dousing the jib is to release the sheets, then lower the halyard while tightening the downhaul. You haul almost three times as much downhaul line as halyard so be sure you keep up. In theory you will end up with the jib in a nice ball on the foredeck. More likely, you will have a well-doused sail that needs a little tidying up. On a genoa some of the sail may be in the water.
For the genoa, I have found it better to keep a sheet tight and then lower the halyard. This has the advantage of the downhaul releasing at the same rate as the halyard. It sometimes leaves a little sail, near the head, in the water. I generally go forward, at my convenience and tie off the jib with a sail tie. It is also possible, once the jib is doused and the halyard secured, to release the sheet and tighten the downhaul to get something close to a tight bundle of sail.
Be careful dousing the jib; it is very easy to pinch or tear the jib if something gets stuck. If the downhaul does not travel freely, slack off a bit, let the wind flog the sail once or twice and it will most likely shake loose the downhaul. If it doesn't, it's probably not very rough and will be easy to go on the foredeck and clear up the problem.
under development
When I first installed the downhaul, I tied it off at the mast near the jib halyard. This required going to the mast and using two hands to douse the jib. And on a CD25 there is not enough room near the mast for two, especially in rough weather.
To improve this, I added a cam cleat to the hatch hood after edge with a bullseye fairlead at the forward edge. Since I already had some there for the jiffy reefing and the vang, I simply added another. Now the crew (sometimes a seven-year-old) can haul on the downhaul from the cockpit while I release the halyard from the mast. This gives me a free hand to hold on which can be useful.
Prior to hoisting the jib, you must ensure there is enough line coiled forward of the bullseye to hoist the jib. It can be very useful to allow just enough line to get the halyard hoisted, then hoist the halyard while leaving the jib partially furled (and secured) by the downhaul. Once the jib is hoisted, it is not flapping and you can take your time getting to the cockpit where you can slowly let out the downhaul and haul on the appropriate jib sheet. In higher winds, this helps keep the jib out of the water.
under development
CAUTION: When slacking off shroud or stay turnbuckles, ensure you do not remove all the threads. On open trunbuckles, this is easy to see. On closed body ones, you can estimate the length of the threaded stud by inserting a small piece of wire into the adjuster hole to the end of the thread.
Prior to disconnecting the forestay, rig the jib halyard as a temporary forstay by the following. Connect the jib hayard to the forestay plate and winch it tight. Now you may release tension on the forestay turnbuckle (completely) and the backstay as required to remove the pin holding the forestay to the plate. If you cannot detach it, slack off the lower and upper shrouds a little, then check if you have adequate play. Repeat until there is enough play.